Securing Azure Web Apps using Application Gateways and vNets
For the last many years, I have used Azure to run pretty much all of the workloads I have built. And deploying applications to Azure Web Apps has been an extremely common thing. However, I was recently tasked with hosting a few web apps on a vNet behind an Application Gateway. A task that didn’t seem too hard, but was made a bit complicated due to poor documentation… At least the documentation I found… So I thought I would document it in a blog post in case anyone else needed to do the same thing.
Comment: It might be VERY well documented somewhere, but I didn’t find it in that case. At least not how to do it using the Azure CLI, which was a requirement in my case…
Why?
Before I go any further, I guess I should explain why this came to be…
The solution I am working on is used by clients that want to have IP restrictions in place in their firewall. This is a bit tricky when it comes to Azure App Services, as they end up in a span of IP addresses that are used by lots of applications. Using an Application Gateway solves this problem, as it is configured to use a fixed public IP addresses.
On top of that, it also allows the owners of the system to manage all traffic coming to the applications in a single place. Allowing for a single place to manage things like HTTPS redirects and TLS termination.
However, if you just put an Application Gateway in front of a web app, the app will still be available through [name].azurewebsites.net, which is a potential problem. To solve this, the web app can be added to a private vNet using a Private Endpoint. This puts the web app “inside” the private network, hidden from the public. This forces all traffic to the application to go through the Application Gateway which is available through the public IP address, but also connected to the private network.

This solution allows the company to run the applications a bit more “secure” and in a slightly more “controlled” way. At the cost of more management and higher running costs…
So let’s have a look at how to set up a solution like this!
Setting up the web site
The first thing I’m going to do, is to set up some variables that will be used while creating this setup. Using Bash, it looks like this
rg="PrivateWebAppDemo"
planName="DemoPlan"
appName="foodemowebapp"
vnetName="DemoNetwork"
gwName="DemoGateway"
Having these variables set up is a lot less error prone than having to input them over and over again…
Once I have the variables, I can create a new Resource Group and a new App Service Plan like this
az group create -n $rg -l "WestEurope"

az appservice plan create -g $rg -n $planName --sku P1V2 --is-linux
This creates a resource group called PrivateWebAppDemo and an App Service Plan called DemoPlan in the West Europe datacenter.
Note: To be able to put a web app in a vNet using a private endpoint, the App Service Plan being used has to be a Premium v2 or v3 SKU (or isolated). This level is a bit more expensive than non-premium plans. However, if you are looking for this type of setup, that price difference is probably not a huge deal.
With the plan in place, it’s time to set up the actual Web App. And since I am a .NET guy, I’ll use the following command to do it
az webapp create -g $rg -p $planName -n $appName --runtime "DOTNET|5.0"
Once this command has run, there should be a Web App up and running for us to play with. And it should be located at http://foodemowebapp.azurewebsites.net
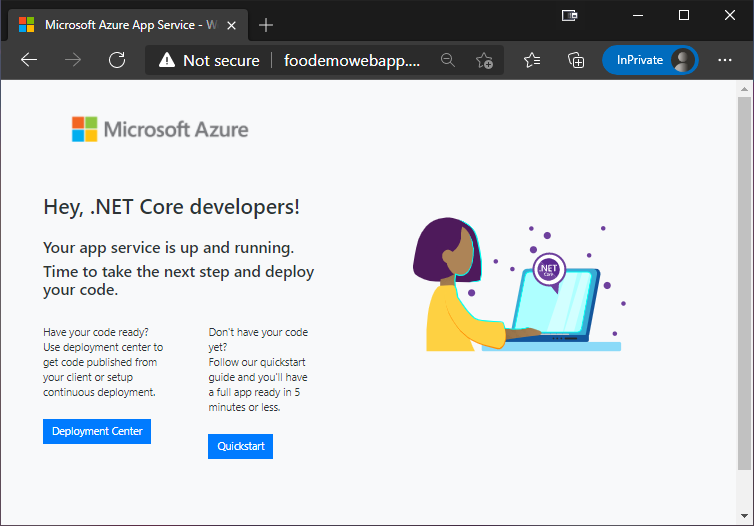
And there it is! That’s the default website that is displayed by a Web App on creation. This is good enough for now, as I don’t need a custom website to demo the routing stuff this post is all about.
Note: I will stick to HTTP instead of HTTPS for this blog post, as setting up SSL termination in the Application Gateway is a couple of extra steps that are really outside of the area I want to cover in this post.
The next step is to set up the Application Gateway in front of the application. However, the Gateway needs to be connected to a vNet, so let’s start by adding one of those.
Adding some networking
Creating a virtual network in Azure is a piece of cake. At least if you just want a simple demo network… The only complicated part is figuring out the IP CIDRs to use.
In this case, I will create a network using this command
az network vnet create -n $vnetName -g $rg --address-prefix 10.0.0.0/16 --subnet-name Default --subnet-prefix 10.0.0.0/24
This creates a vNet called DemoNetwork using 10.0.0.0/16, and a subnet called Default using 10.0.0.0/24. This means that the whole network will use IP addresses between 10.0.0.0 and 10.0.255.255, and inside that network, the Default subnet will use the IP addresses between 10.0.0.0 and 10.0.0.255.
The Default subnet is where the Gateway will live. However, I also need a subnet for the application to live. So to create that, I run
az network vnet subnet create -g $rg --vnet-name $vnetName -n Apps --address-prefixes 10.0.1.0/24
This creates another subnet called Apps. And the 10.0.1.0/24 CIDR means that it will occupy the IP addresses from 10.0.1.0 to 10.0.1.255.
With the network in place, I can finally create the Application Gateway.
Creating an Application Gateway
To create the Application Gateway, I run a command that looks like this
az network application-gateway create -g $rg -n $gwName --capacity 1 --sku Standard_v2 --vnet-name $vnetName --subnet Default --public-ip-address DemoPublicIp
This creates a single instance Application Gateway, connected to the Default subnet I just created. The --public-ip-address DemoPublicIp parameter tells it to also connect a Public IP address called DemoPublicIp to the Gateway. And since there isn’t a Public IP address with that name already, it will create a new Public IP resource with that name for us as well.
Default Gateway Configuration
Before going any further, it might be worth mentioning what the default configuration for an Application Gateway looks like…
The default set up for an Application Gateway includes the following “pieces”
First of all, it connects the chosen Public IP address using a “Frontend IP Configuration” called appGatewayFrontendIP.
It then creates HTTP Listener called called appGatewayHttpListener, which is set up to listen to any HTTP call to port 80 using the Public IP.
It also creates an HTTP Setting, called appGatewayBackendHttpSettings, which is simply set up to forward calls to the backend target using HTTP on port 80.
To be able to define the backend “targets”, a “backend pool” called appGatewayBackendPool is created. However, out of the box, the default backend pool is empty. For somewhat obvious reasons…
Finally, it creates a routing rule called rule1 that basically ties it all together by making sure that requests coming in to appGatewayHttpListener are redirected to the appGatewayBackendPool using the appGatewayBackendHttpSettings.
Now that I have a Web App and an Application Gateway, it is time to configure the Gateway to redirect traffic to the application. The easiest way to do this is to add the app to the currently empty appGatewayBackendPool backend pool like this
az network application-gateway address-pool update -g $rg -n appGatewayBackendPool --gateway-name $gwName --servers "${appName}.azurewebsites.net"
This adds the Web App as a part of the backend pool, meaning that any incoming request that is redirected to the pool is forwarded to the web app.
Once that command has run, one would expect that you could just browse to the public IP address of the Gateway, which in my case means http://52.149.106.34…
However, that just ends up with this
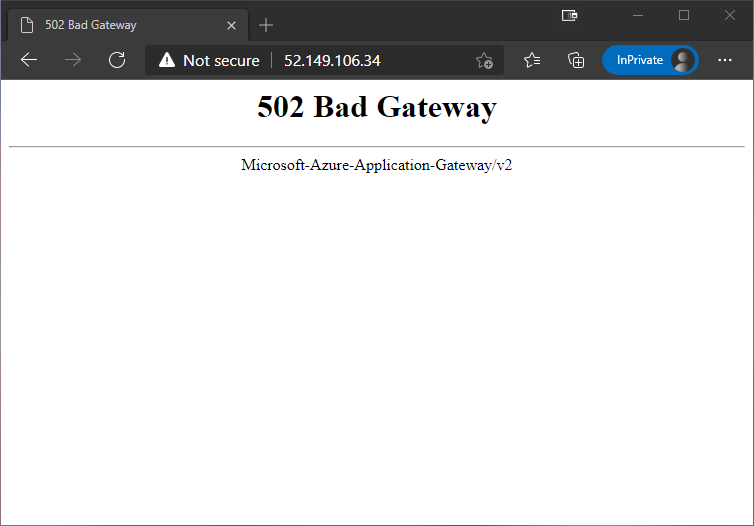
The reason for this is that Azure Web Apps are multi-tenant, and rely on the Host header to figure out what application to send the request to. However, the default HTTP Setting in the Gateway is set up to just forward the original header. In my case that means Host: 52.149.106.34.
To solve this, I need to re-configure the HTTP Setting to use the host name from the target that I have defined in the backend pool. As this is a common requirement, it is really easy to do. It just a matter of running
az network application-gateway http-settings update -g $rg -n appGatewayBackendHttpSettings --gateway-name $gwName --host-name-from-backend-pool true
The first part of this command is just defining what HTTP Setting and Gateway to use. The important part is the --host-name-from-backend-pool true. This tells the Gateway that whenever this HTTP Setting is used, the Host header needs to be changed to correspond to the target defined in the backend pool. In this case that means replacing the incoming IP address with foodemowebapp.azurewebsites.net.
With that in place, I can now browse to the IP address again, and get greeted by this…
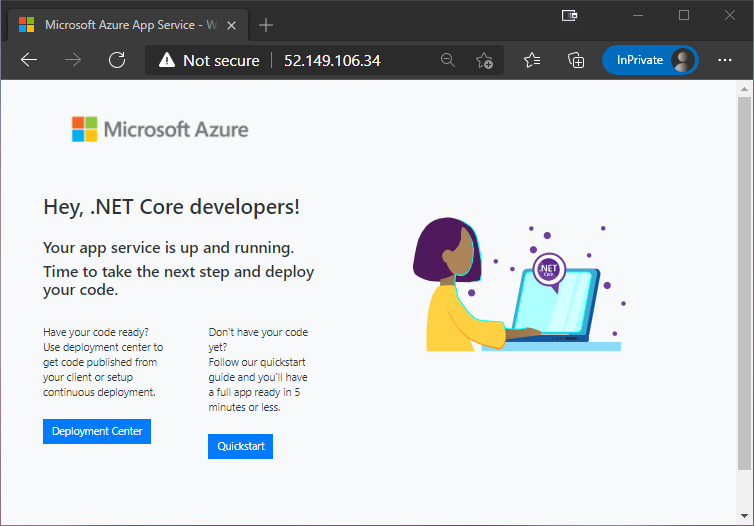
So, it all seems to work as expected. However, I can still reach the Web App using http://foodemowebapp.azurewebsites.net as well…

It is definitely a step in the right direction that we can now reach the application through the Gateway, but we still haven’t made it private by “hiding” it inside our own network.
Adding the Web App to our vNet
Adding a Web App to a vNet is a piece of cake, at least if you have remembered to set up a Premium App Service Plan. All that is needed is a Private Endpoint.
A Private Endpoint is a resource that allows us to connect a Web App to a virtual network interface that is connected to a vNet. And it is really easy to set up. However, if I were to try and do that as the solution look right now, I would just end up with an error message like this
(PrivateEndpointCannotBeCreatedInSubnetThatHasNetworkPoliciesEnabled) Private endpoint /subscriptions/ba40d97f-a1a4-4a24-9f9b-XXXXXXXXXXXX/resourceGroups/PrivateWebAppDemo/providers/Microsoft.Network/privateEndpoints/foodemowebapp-endpoint cannot be created in a subnet /subscriptions/ba40d97f-a1a4-4a24-9f9b-XXXXXXXXXXXX/resourceGroups/PrivateWebAppDemo/providers/Microsoft.Network/virtualNetworks/DemoNetwork/subnets/Apps since it has private endpoint network policies enabled.
Basically a very long error message that says that it can’t add a Private Endpoint to the network as it still has “private endpoint policies” enabled. So, before I set up the Private Endpoint, I need to disable the “private endpoint network policies” for the App subnet using a command that looks like this
az network vnet subnet update -g $rg --vnet-name $vnetName -n Apps --disable-private-endpoint-network-policies true
Once the endpoint policies have been disabled, I can create the Private Endpoint using two commands that looks like this
webAppId=$(az webapp show -g $rg -n $appName --query "id" --out tsv)

az network private-endpoint create -g $rg -n "${appName}-endpoint"  --vnet-name $vnetName --subnet Apps --private-connection-resource-id $webAppId --connection-name "${appName}-connection" --group-id sites
The first command just gets the resource ID of the Web App in question.
The second command creates a new Private Endpoint that uses a virtual network interface to connect it to the vNet/subnet we have defined.
Once a Private Endpoint is added to a Web App, it becomes “private” and public access from the internet is removed. This means that if I try to browse to http://foodemowebapp.azurewebsites.net now, I and faced with
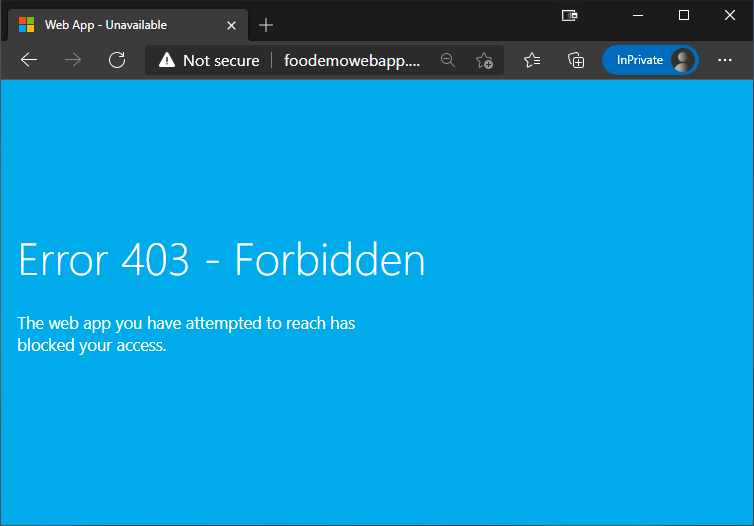
Ok, so I can obviously not reach the application using the public address anymore…
Tip: If you are following along and you try to browse to the application and don’t get a 403 Forbidden. Try pressing Ctrl+F5 to refresh the page, as caching can cause it to look as though it is still online.
But what happens if I try top browse to the Gateway through the IP address now?

Wait…What!? I can’t reach it here either?
Well, there us a reason for that… And the reason is that the Gateway was just redirecting traffic to the public address, which we have now blocked…
The solution to this is to set up an Private DNS Zone that allows the Gateway to route traffic to the application through the vNet.
Adding a DNS Zone
The first step in making the DNS look ups inside the vNet work, is to create a Private DNS Zone like this
az network private-dns zone create -g $rg -n privatelink.azurewebsites.net
The name privatelink.azurewebsites.net is VERY important. It is the thing that makes the whole thing tick. So don’t try and change that because you dislike it for some reason!
Once the new Private DNS Zone is in place, it needs to be linked to the vNet to make it possible to use it to do DNS look ups inside the network. This is done by executing a command that looks like this
az network private-dns link vnet create -g $rg -n "${appName}-dnslink" --registration-enabled false --virtual-network $vnetName --zone-name privatelink.azurewebsites.net
Finally I need to add the Web App to the new DNS Zone to make it possible to find it. This is done by creating a DNS Zone Group for the Web App like this
az network private-endpoint dns-zone-group create -g $rg -n $appName --endpoint-name "${appName}-endpoint" --private-dns-zone privatelink.azurewebsites.net --zone-name privatelink.azurewebsites.net
Ok, so now we have a Private DNS Zone that the Gateway can use to find the Web App through the vNet. So let’s try browsing to the IP address again

Hmm…ok…what’s wrong now?
Well, the backend pool still tries to reach the Web App using the public address, as it was set up before there was a private endpoint for it to use. To solve that, I need to “refresh” the backend pool by executing the same command as I ran before
az network application-gateway address-pool update -g $rg -n appGatewayBackendPool --gateway-name $gwName --servers "${appName}.azurewebsites.net"
The difference is that this time it will look at the Private DNS Zone and figure out that it should route the traffic to the Private Endpoint instead of the public address.
With the backend pool updated, browsing to http://52.149.106.34/ once again results in

Sweet! However, the Web App still allows traffic from any subnet in the vNet to reach it. Looking at the Access Restrictions for the Web App in the portal, we can see

In some cases that’s fine, and in other it’s not. If it isn’t fine, and you want to limit the subnets that are allowed to access the Web App, you can do so by running
az webapp config access-restriction add -g $rg -n $appName --rule-name 'WebAppAccess' --priority 200 --action Allow --vnet-name $vnetName --subnet Default
This changes the Access Restrictions by adding an Allow rule for the subnet Default, and a Deny rule for everything else. This means that the Gateway, which is on the Default subnet is allowed to access the app, but resources on other subnets would not be allowed.

Cool, so now, access to the application is limited to a subset of subnets.
Adding a DNS record
Now that we have an application up and running securely behind an Application Gateway, it is time to configure a DNS record for it.
In my case, I happen to already have a DNS Zone in Azure that I can use. All I need to do, is to create a new A record by running
az network dns record-set a add-record -g DNS -z zerokoll.com -n foo -a 52.149.106.34
This creates an A record called foo, pointing to 52.149.106.34, in my DNS Zone zerokoll.com, which is located in the resource group DNS.
With this record in place, I can now browse to http://foo.zerokoll.com
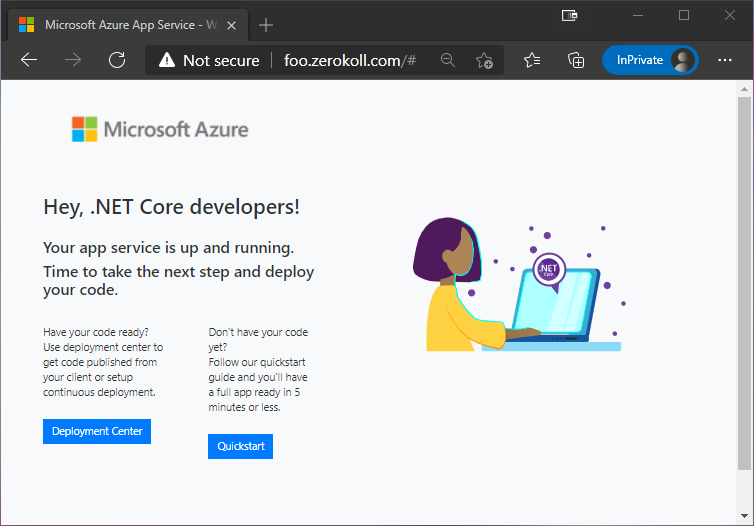
However, there is a tiny little issue still…
Header forwarding
The issue is not really apparent in this app, as it doesn’t really do anything. However, if I create a simple ASP.NET Core application with a request pipeline that looks like this.
public void Configure(IApplicationBuilder app)
{
    app.Use(async (context, next) =>
    {
        await context.Response.WriteAsync($"Host: { context.Request.Host }\r\n" +
                                            $"Protocol: { context.Request.Protocol }\r\n" +
                                            $"Remote IP: { context.Connection.RemoteIpAddress }");
    });
}
and publish it to the Web App. I get the following result when browsing to it
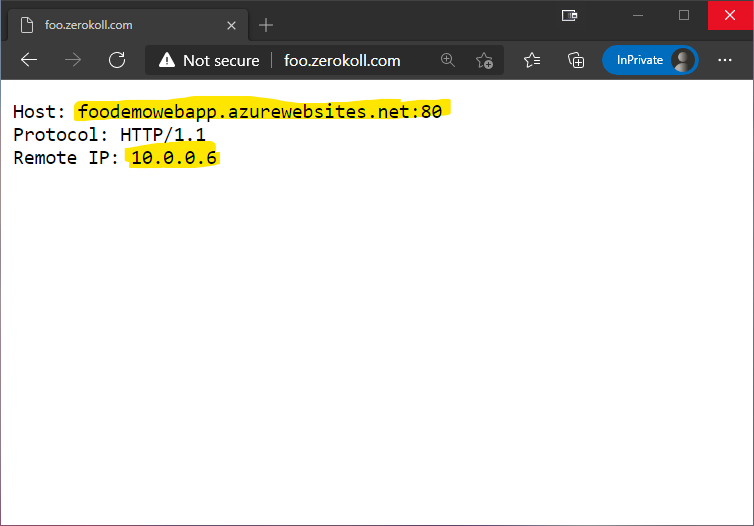
As you can see, the Host and Remote IP information is a bit off. The reason for this is that the request, from the Web App’s point of view, comes from the Application Gateway and my browser.
Note: This causes more problems than just the headers being wrong. It also interferes with redirects and other things. So do make sure that you add the following fix for your website to work properly!
However, the Application Gateway is nice enough to add the correct values to the request using X-Original-XX and X-Forwarded-XX headers. But I’m still responsible for telling ASP.NET that I want to use those values instead of the default ones…
Luckily, this is quite an easy task, as there is already a middleware available for this specific need! All I need to do is to add the following code
public void ConfigureServices(IServiceCollection services)
{
    services.Configure<ForwardedHeadersOptions>(options =>
    {
        options.ForwardedHeaders = ForwardedHeaders.All;
        options.ForwardedHostHeaderName = "X-Original-Host";
        options.ForwardLimit = 2;
    });
}

public void Configure(IApplicationBuilder app)
{
    app.UseForwardedHeaders();

    app.Use(...);
}
This will make sure that the correct values are being returned!
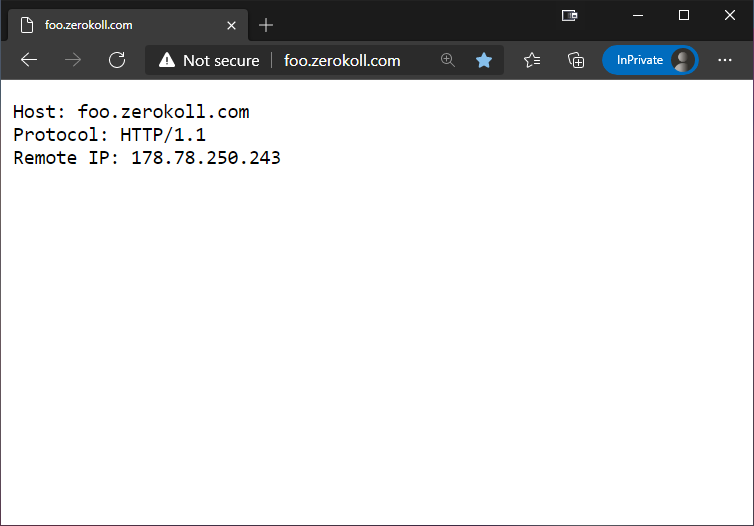
There are a couple of things to note in the above code. First of all, the Application Gateway doesn’t use the default X-Forwarded-Host header for the host, instead it uses X-Original-Host. So to fix that, I need to manually tell it to use the X-Original-Host headers instead.
Secondly, it took me quite some time to figure out why I couldn’t get the remote IP address to be set to the correct value. The solution was to set the options.ForwardLimit to 2 instead of the default 1. I assume it is because the request jumps from the Application Gateway to the Private Endpoint/NIC on the internal network, and then to the Web App. Anyhow, setting it to 2 solves that problem.
Clean up
Now that we know that it all works, and we have played around with it a little bit, I guess it is time to tear it all down again so that it doesn’t run up a big bill!
az group delete -g $rg --yes
On a side note, I just mention how much I love the “cloud”. It’s just so cool that I’m able to spin up a bunch of resources very easily, pay a dollar or 2 to try it out, and then with a single command, tear it all down without being stuck with a bunch of hardware I don’t need anymore! Just imagine trying to set this up this solution using your own hardware…
Conclusion
Putting your web apps on a private network behind a Gateway is a great way to add an extra layer of security. Not to mention that it also makes easy to add a Web Application Firewall (WAF) to the solution. And if you only need to access them from your internal workloads on the vNet, you can even skip the Gateway completely. That way, the web apps become 100% private on your own network, and only available to your own stuff.
However, I must admit that it has taken me a bit of time to figure it all out… This could be because I’m not the sharpest tool in the shed. Or it could be because it isn’t really well documented anywhere… Or a combination… Either way, I’ve got it to work, and now you can too!
I hope you can use this information, and that it makes your life a bit easier if you ever need to get your apps running in a vNet!
Feel free to reach out at @ZeroKoll if you have any questions! I’m not sure I can answer them, but I will definitely try!
Note: If you want to know more about the underlying things that were used in this post. Things like Private Endpoints, Service Endpoints, NAT Gateways and so on. Have a look at my follow up post Azure Private Endpoints, Service Endpoints etc